
New · DoF Viewer 4.0
Depth of field, at a glance.
DoF Viewer works out sharpness, background blur, angle of view and depth of field spread for more than 670 cameras.
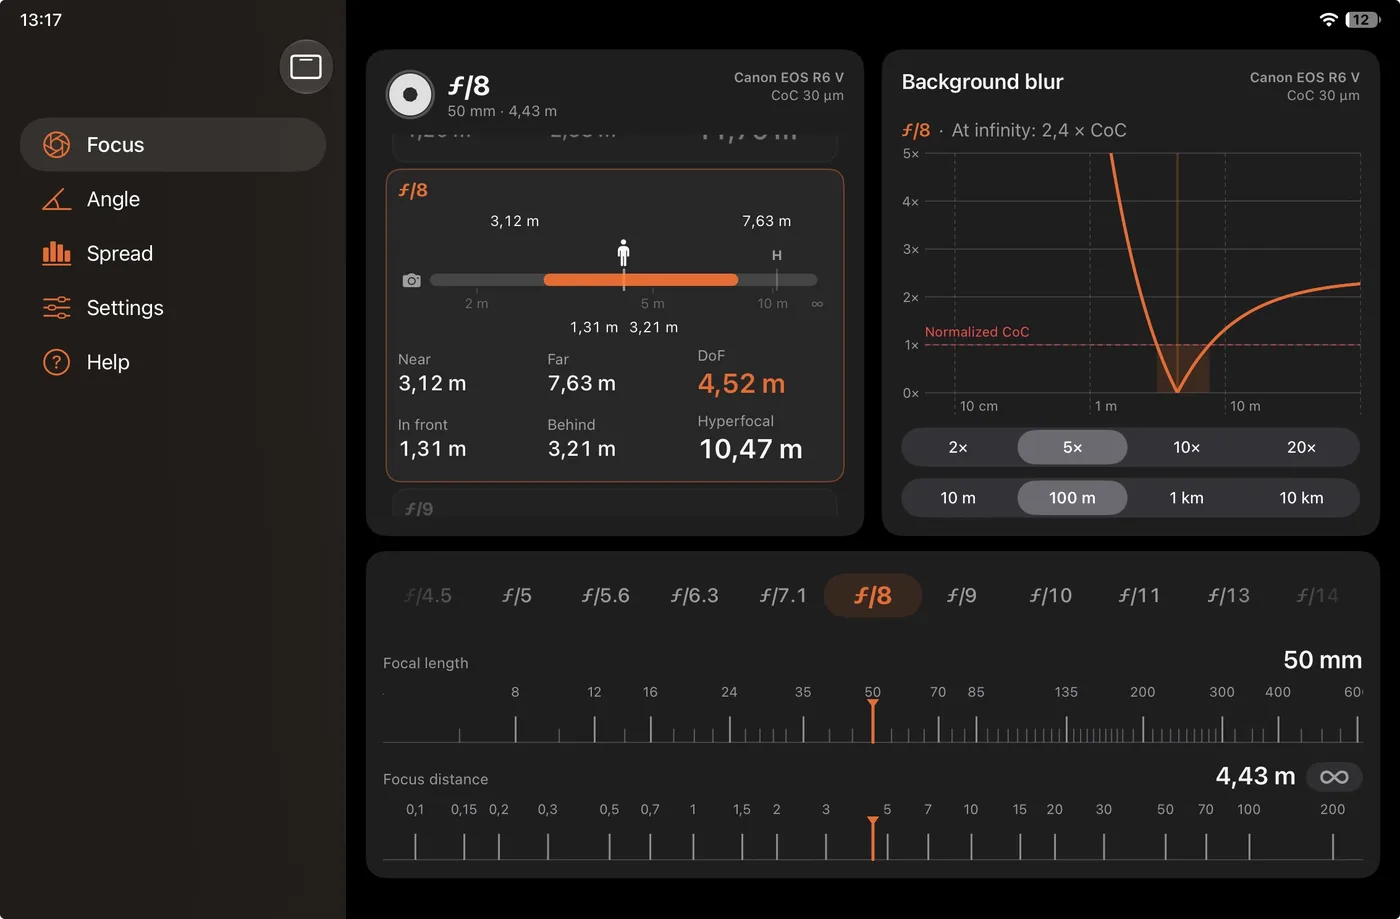
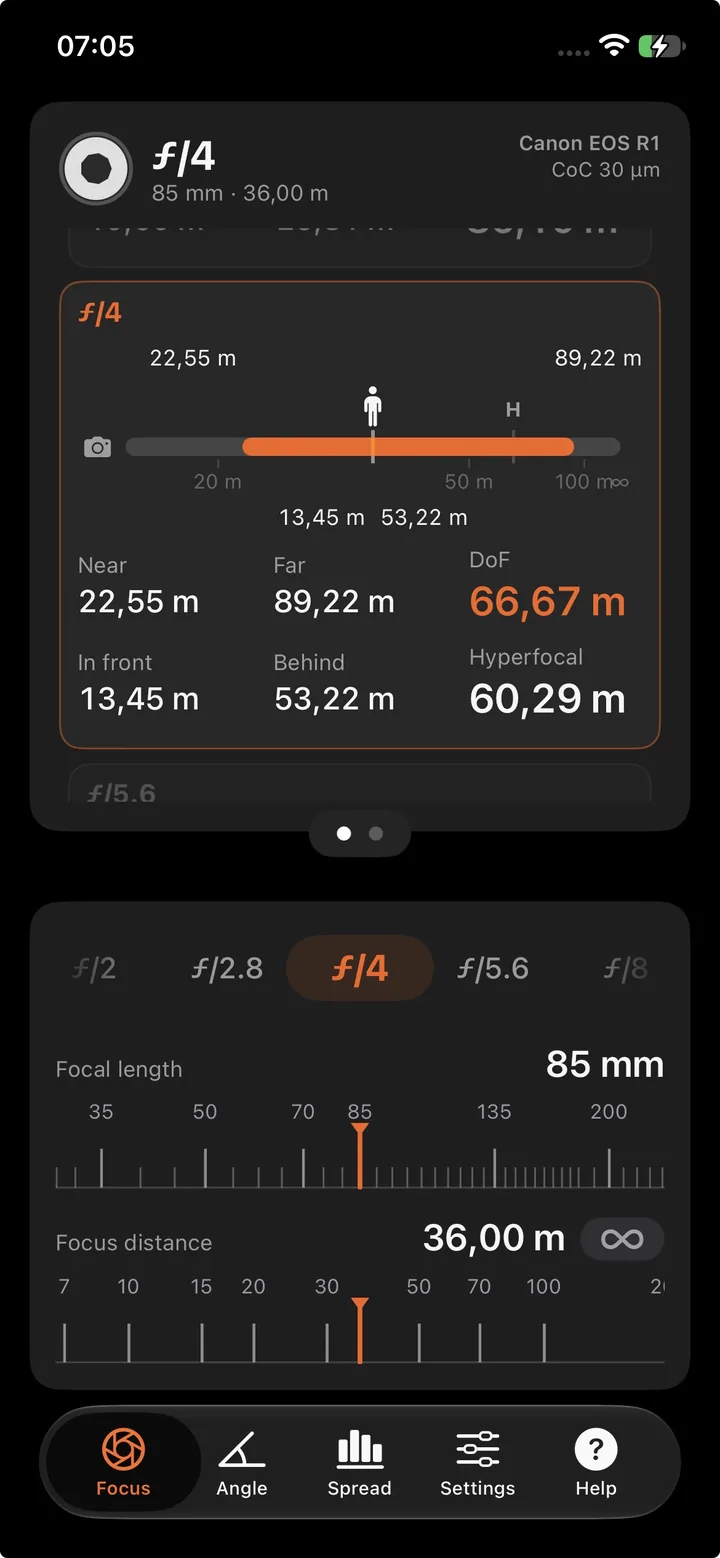
- 670+ digital cameras
- 10 film formats
- 4 calculation views: Focus, background blur, Angle, Spread
- iPhone + iPad iOS 18 or later, in English and French
How it works
Three gestures, and you can read it.
No form to fill in, no “Calculate” button: the results follow your fingers.
-
Set
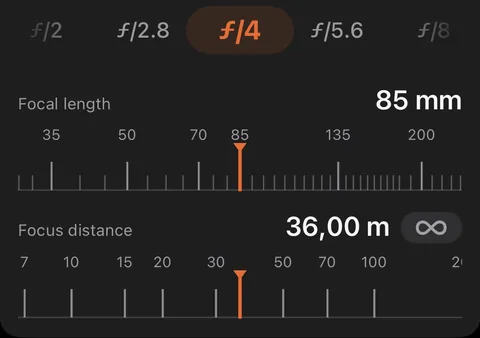
Pick your camera, then the focal length and the focus distance on the scrolling rulers.
-
Drag
Drag up or down on the cards to move from one aperture to the next; a short drag moves one stop.
-
Read
Near and far limits, depth of field, hyperfocal distance: it's all there, at a glance.
Try it here
Drag the cards, just like in the app.
Scroll the aperture cards up or down, or tap an ƒ-number. Change the focal length and the focus distance: the sharp zone, in orange, moves along the ruler.
Simplified web demo: 24×36 format, 0.030 mm circle of confusion, Normal mode, full stops. The app itself knows more than 670 cameras and 10 film formats, handles half and third stops, and has Expert mode.
CoC 30 µm
Focus
One card per aperture
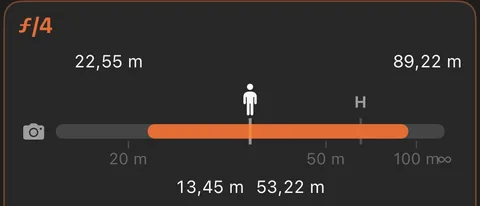
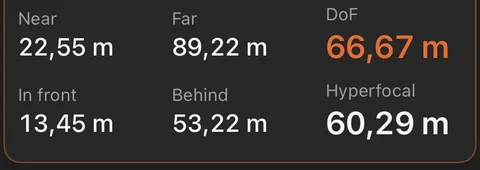
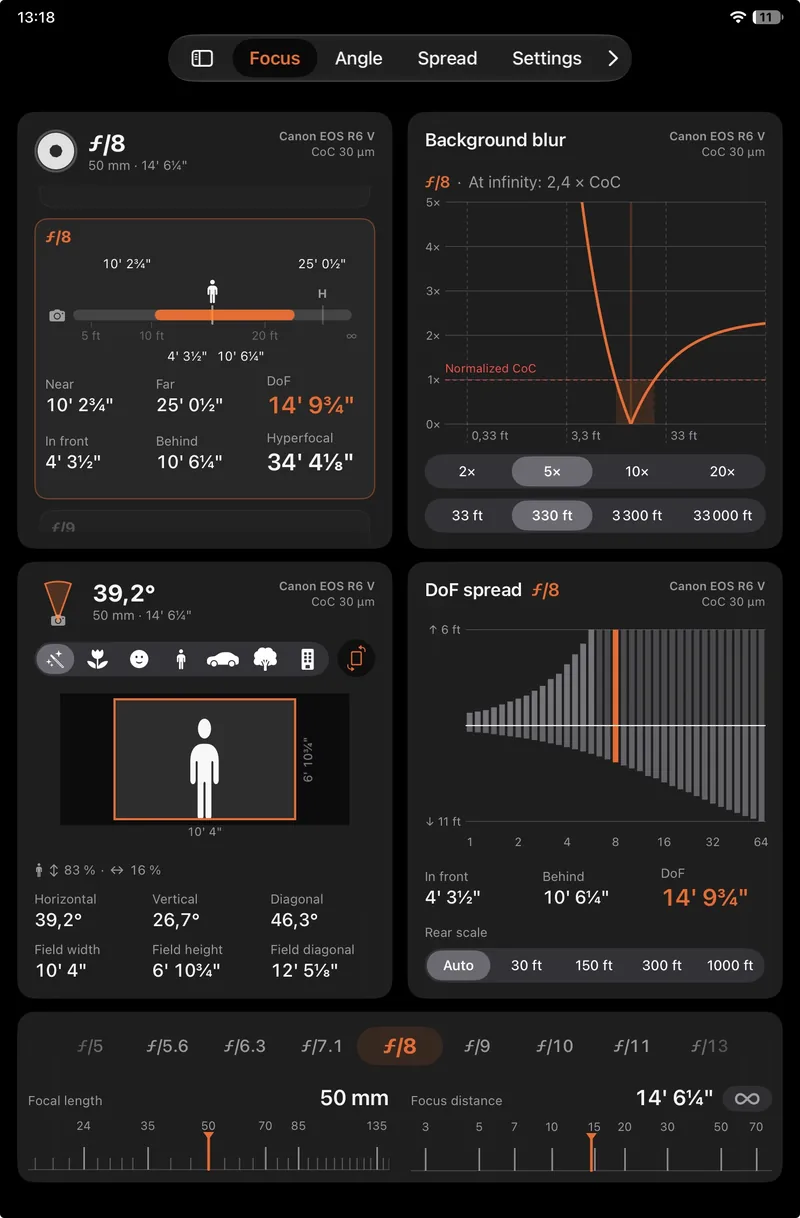
As in DoF Viewer 3.0, every aperture has its own card. A graduated sharpness ruler shows the sharp zone around the subject symbol, with the H mark for the hyperfocal distance.
- The sharpness barIn orange, the sharp zone, from the near limit to the far limit.
- The H markThe hyperfocal distance: focus here and sharpness extends to infinity.
- The valuesNear, Far, In front, Behind, DoF and Hyperfocal.
Remember: In front and Behind are measured from the subject; Near and Far from the camera.
Swipe left to switch to the background blur chart.
Background blur
See how blurred the background will be
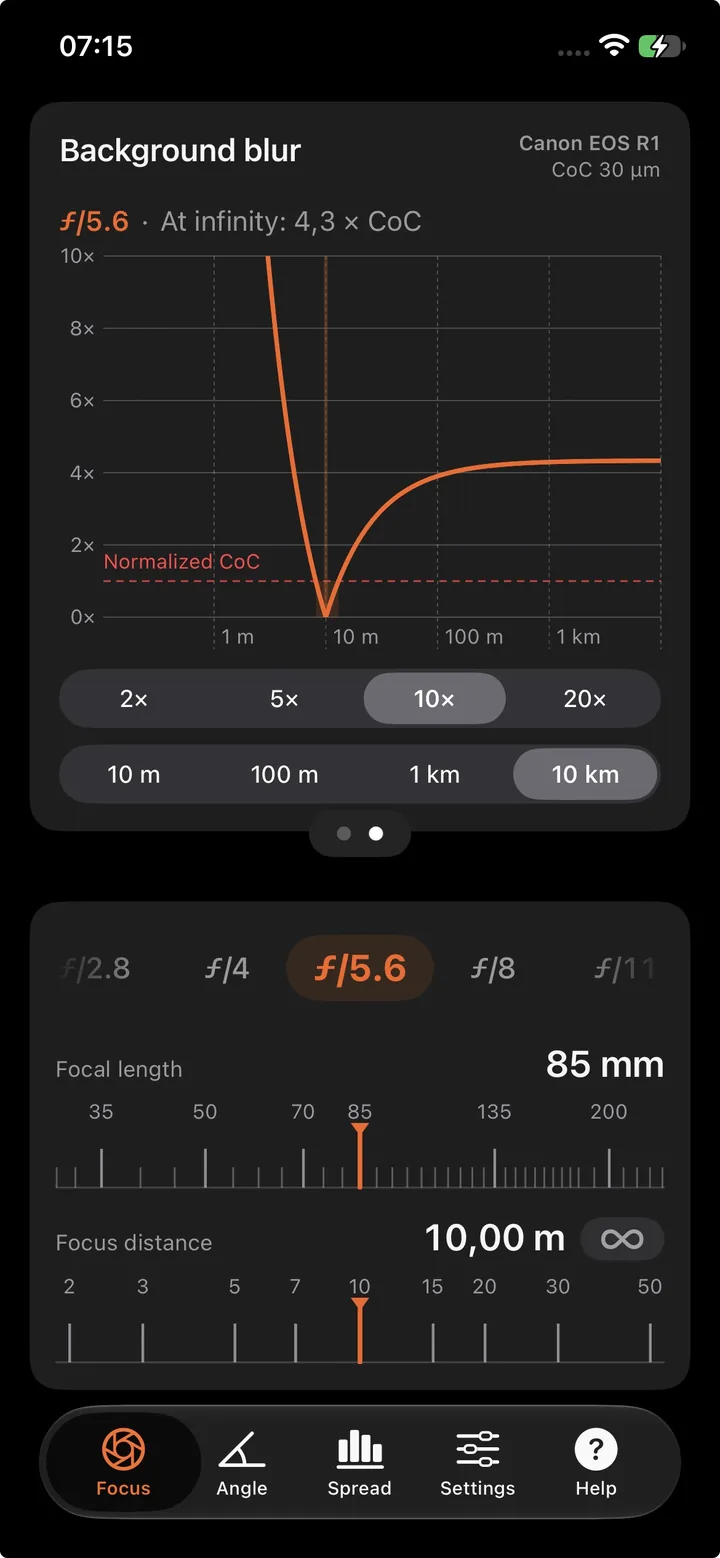
A chart shows the size of the blur against distance, in multiples of the circle of confusion, together with the sharpness limit. Ideal for dialling in bokeh, or checking that a background stays readable.
- Focus pointThe low point of the curve: where blur is zero.
- Normalized CoCThe red line: the sharpness limit. Below the line, it's sharp.
- Blur at infinityThe plateau on the right: the maximum blur of the distant background.
- Vertical scale 2× · 5× · 10× · 20×
- Horizontal scale 10 m · 100 m · 1 km · 10 km
Angle
Frame it before you press the shutter
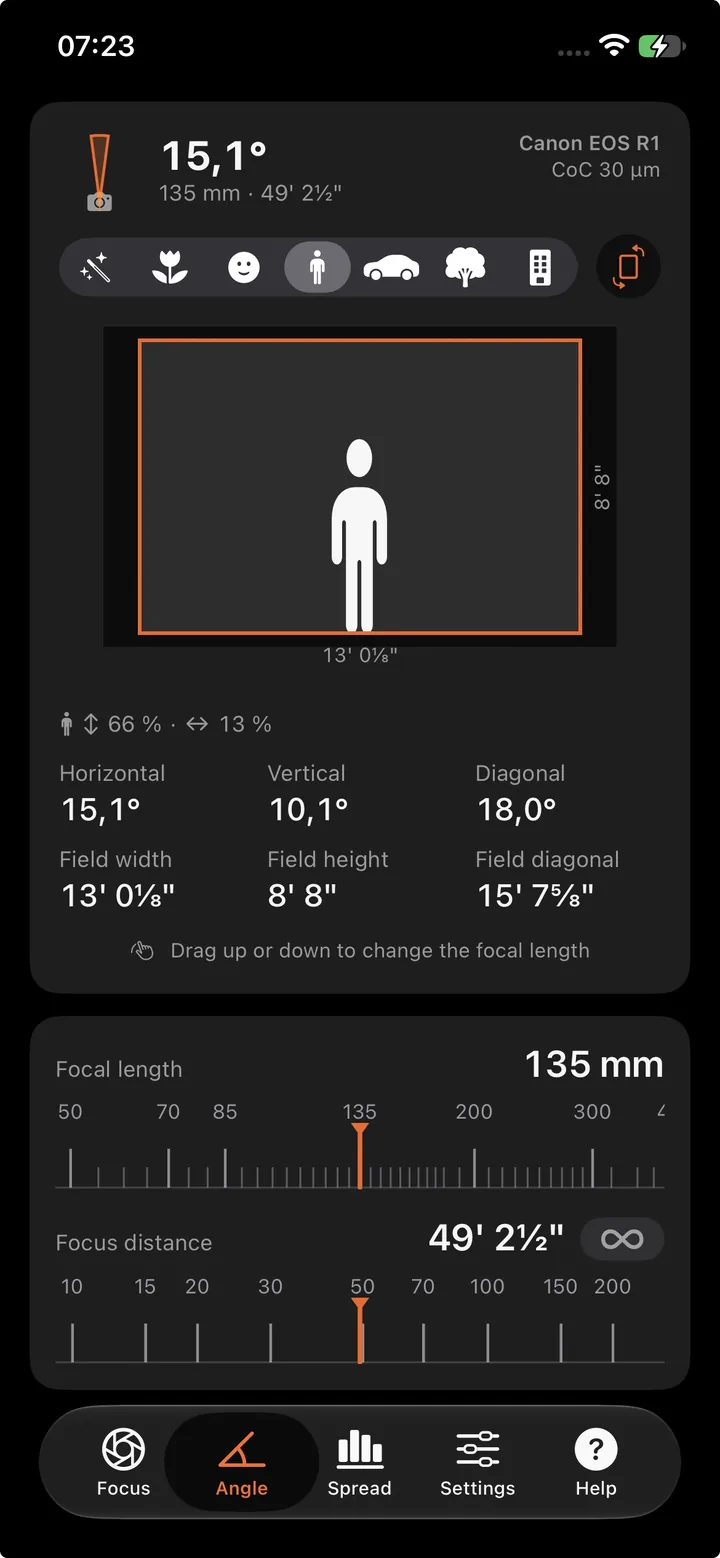
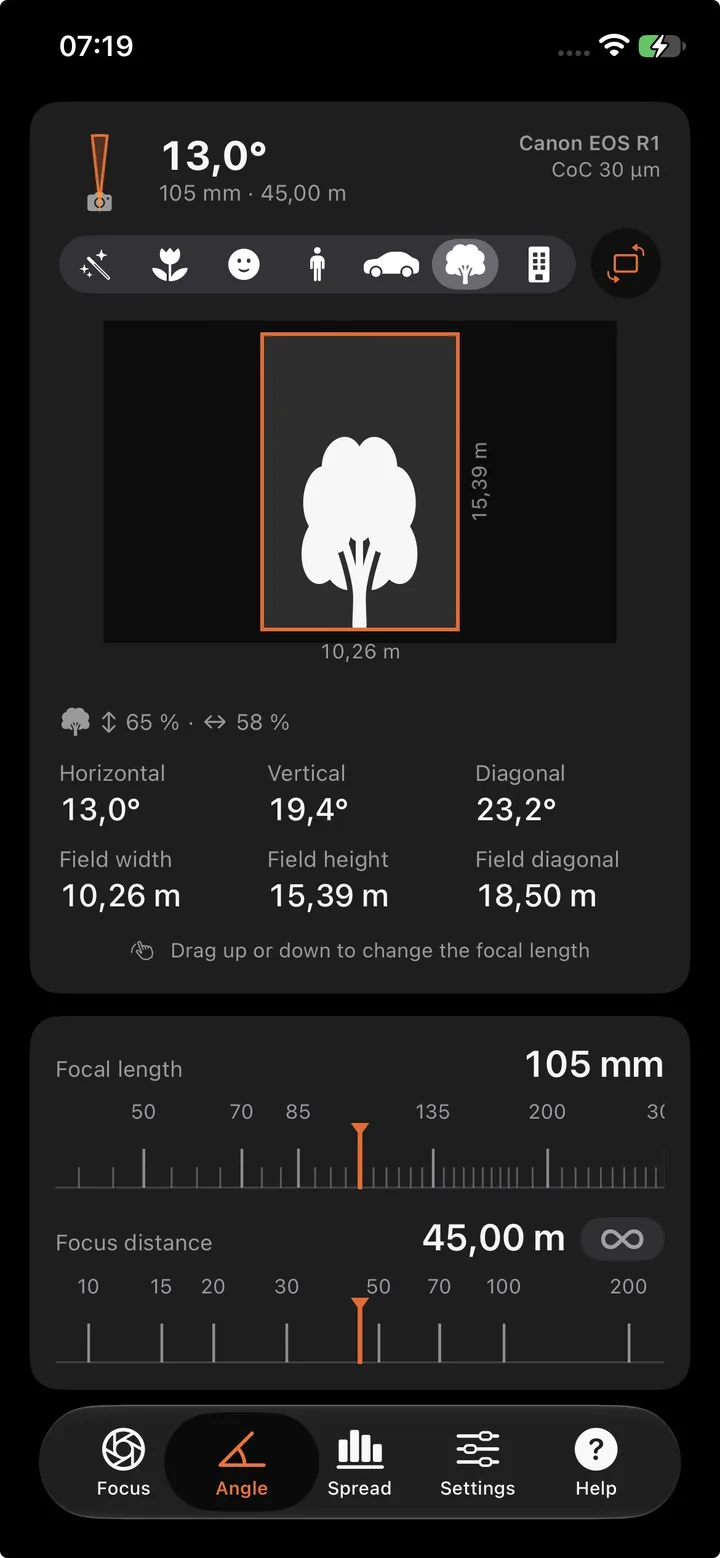
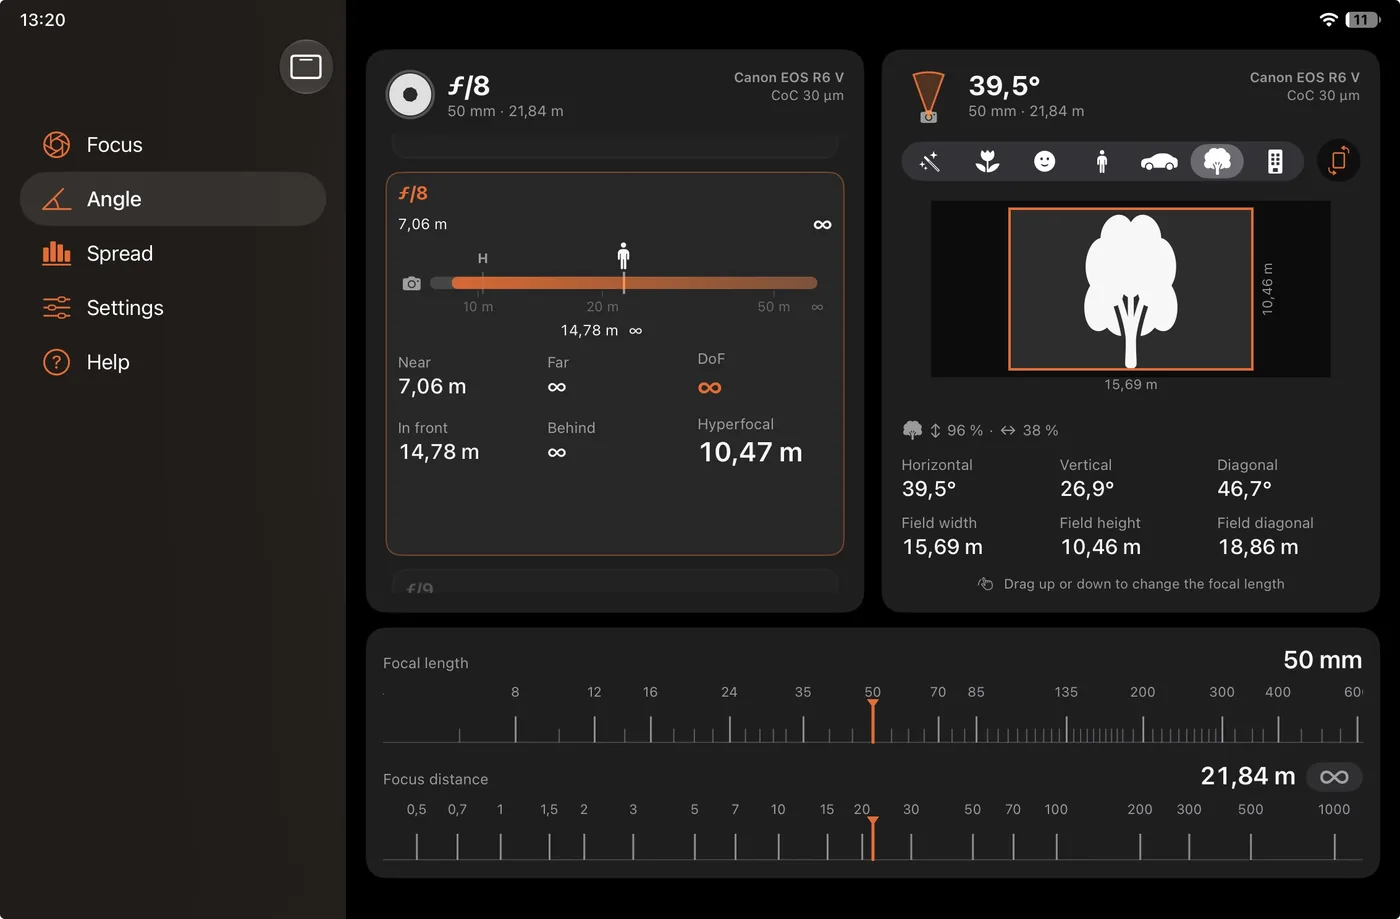
Horizontal, vertical and diagonal angles, plus field width and height at the chosen distance. A reference object, drawn to scale, shows how much of the picture it will fill.
- Flower
- Face
- Person
- Car
- Tree
- Building
In landscape or portrait, with the share of the picture filled in height and width. Drag up or down to change the focal length.
Spread
Where the sharpness lies, aperture by aperture
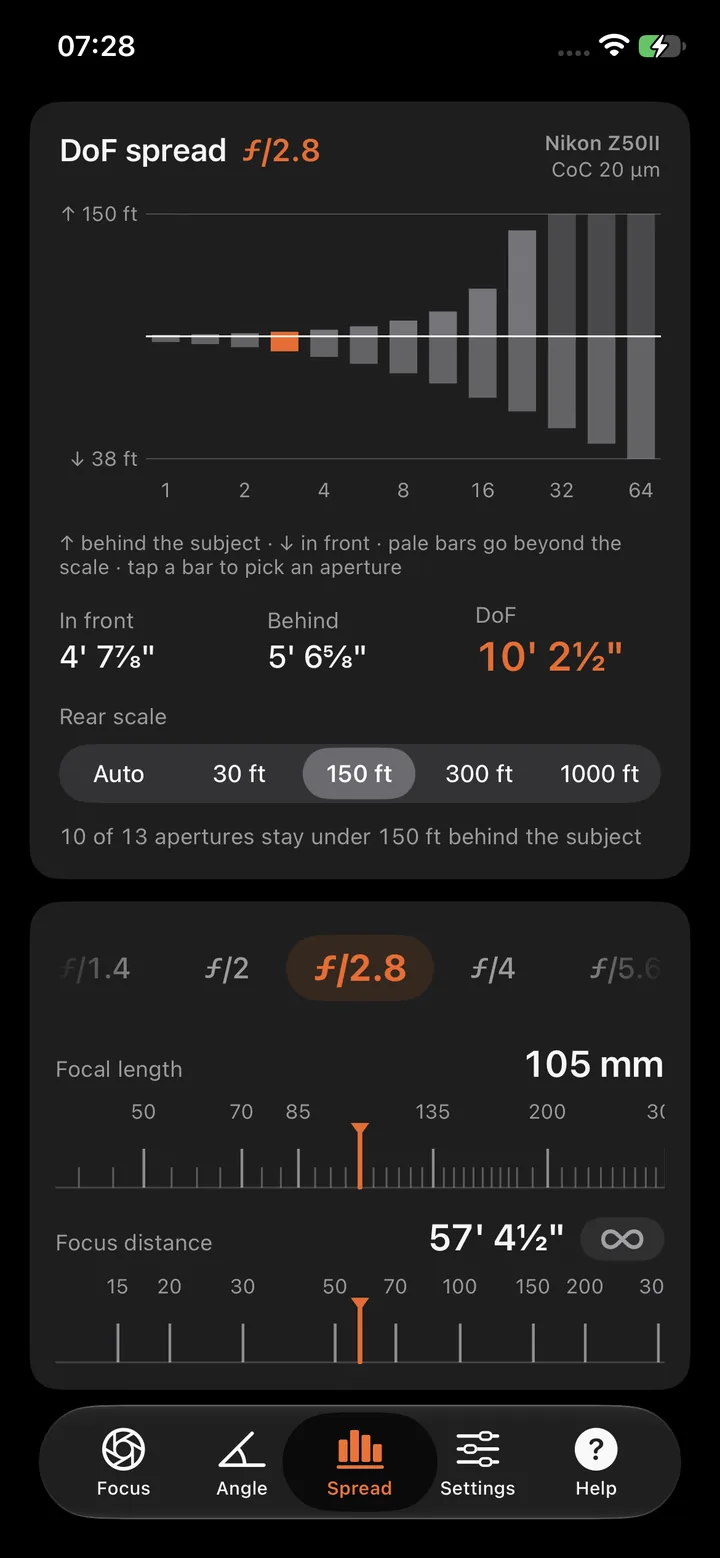
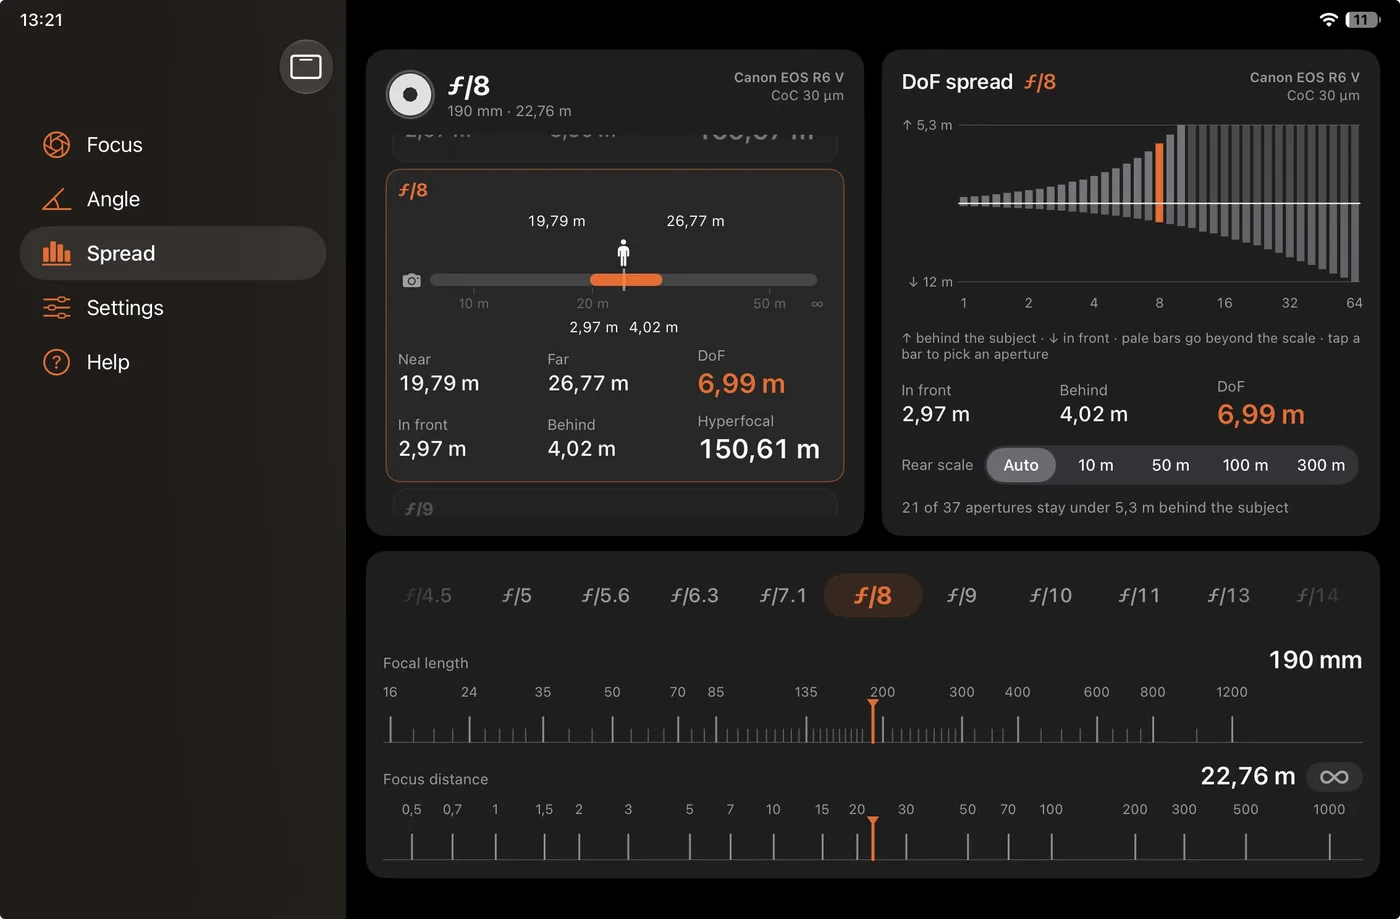
For every aperture at once, bars show the depth of field behind the subject (upwards) and in front of it (downwards). See at a glance what you gain by stopping down one click.
- Selected apertureTap a bar: it turns orange and the aperture follows.
- Rear scale Auto · 10 · 50 · 100 · 300 m
- or 30 · 150 · 300 · 1000 ft
Also in the app
Metric or imperial units
Metres or feet, your choice.
Aperture scale
Full, 1/2 or 1/3 stops.
Custom cameras
Add your own if it's missing from the list.
Built-in help
In English and French, from depth of field to Expert mode.
Expert mode
Expert mode: a circle of confusion worked out for your print
Depth of field depends on a threshold: the circle of confusion (CoC), the size of the smallest blur the eye still sees as a sharp point. That threshold is not a constant.
-
Visual acuityof the viewer: high, medium or low.
-
Viewing distanceof the picture: up close, or from a few metres away.
-
Enlargement ratiobetween the sensor and the final print.
The classic value of 0.030 mm for 24×36 assumes a 16 × 24 cm picture viewed from 25 cm. As soon as the print size or the viewing distance changes, that value is no longer accurate enough. Expert mode recalculates the circle of confusion from the sensor format, visual acuity (high, medium, low), viewing distance and print size.
-
16 × 24 cm reference pictureViewed from 25 cm. The two red circles: the reference CoC.
-
EnlargementVisible detail grows too: the reference CoC no longer matches.
-
New CoC carried back to the sensorSmaller, or larger, depending on your real viewing conditions.
| Mode | Circle of confusion used |
|---|---|
| Normal | The value from the camera database, using the Zeiss formula (0.030 mm for 24×36). |
| Expert | Worked out from your conditions: sensor format, visual acuity, viewing distance and print size. |
Cameras
More than 670 cameras, 10 film formats
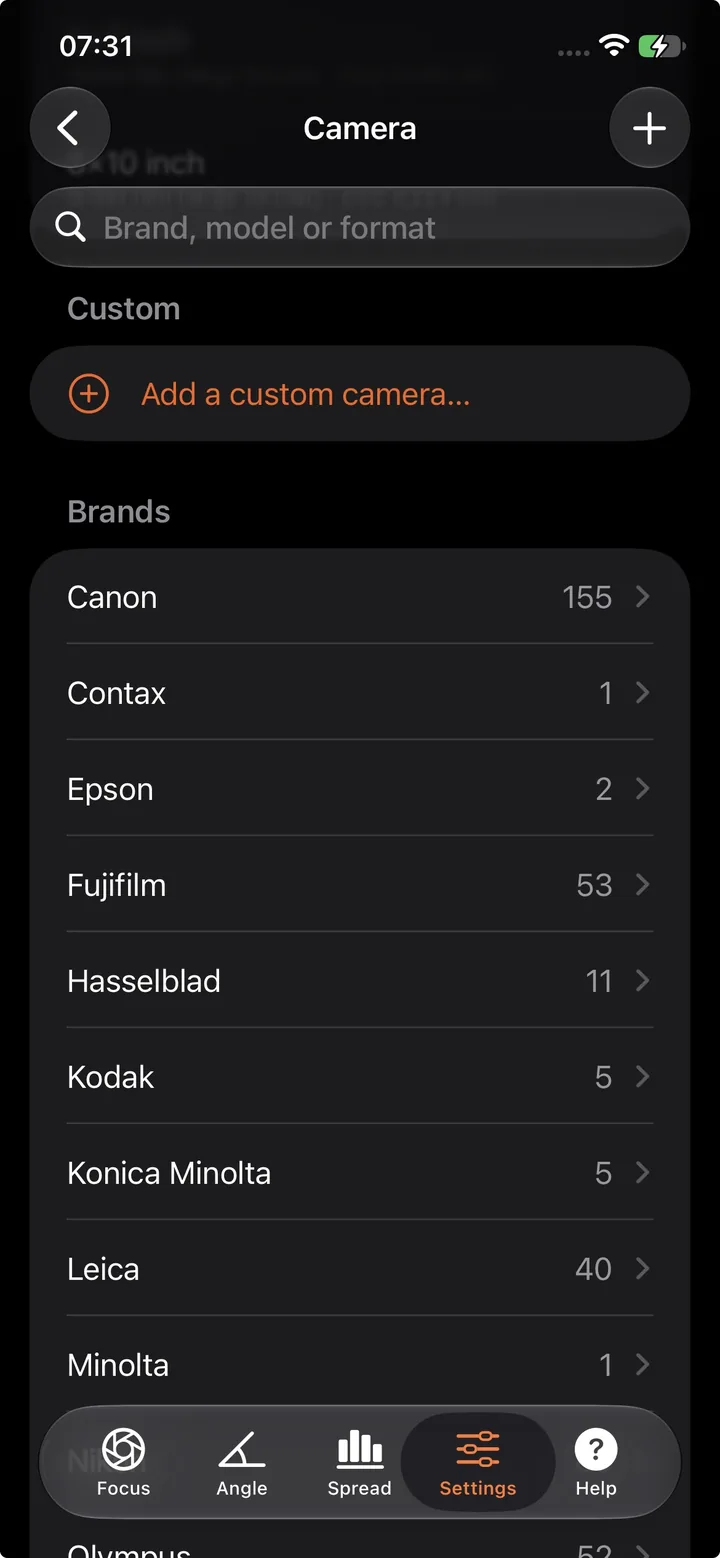
Find your camera by searching (brand, model or format) or from the list of brands. The ones you used last stay close at hand in recents, and you can add your own cameras.
- Canon
- Sony
- Nikon
- Fujifilm
- Panasonic
- OM System
- Pentax
- Leica
- Hasselblad
- …
Film formats go all the way up to large format, such as 8×10 inch sheet film.
iPad
Made for iPad, too
In landscape, two views side by side: Focus on the left, blur, angle or spread on the right. In portrait, a four-view grid.
FAQ
Frequently asked questions
What is the difference between Near/Far and In front/Behind?
All four values describe the same sharp zone, measured from two different starting points.
- Near
- distance from the camera to the first sharp point;
- Far
- distance from the camera to the last sharp point;
- In front
- how far sharpness extends between the subject and the first sharp point;
- Behind
- how far sharpness extends between the subject and the last sharp point.
Depth of field (DoF) is the gap between Far and Near, in other words In front + Behind. The hyperfocal distance is the focus distance at which sharpness extends to infinity.
What is the circle of confusion, and why does it depend on the camera?
A point of the subject outside the plane of focus forms a small spot on the sensor. As long as that spot stays below a certain size, the eye sees it as a sharp point: that threshold is the circle of confusion (CoC).
It depends on the camera because it depends on sensor size: the smaller the sensor, the more the picture has to be enlarged to be viewed, and the smaller the CoC must be. That is why DoF Viewer pairs a CoC with each camera.
My camera isn't in the list. What can I do?
In Settings › Camera, tap “Add a custom camera…” to create your own.
What is the difference between Normal and Expert mode?
In Normal mode, DoF Viewer uses the circle of confusion from its database, worked out with the Zeiss formula (0.030 mm for 24×36). That value assumes a 16 × 24 cm picture viewed from 25 cm.
Expert mode recalculates the circle of confusion from the size of your print, the distance it will be viewed from and the visual acuity you choose. Useful for a large print viewed up close or, conversely, a picture seen from afar.
Which devices does the app run on?
iPhone and iPad, with iOS 18 or later. On iPad, the app makes the most of the screen: side-by-side views in landscape and a four-view grid in portrait.
Is the app available in French?
Yes. DoF Viewer is available in English and French, built-in help included. Ce site existe aussi en français.

Master your depth of field.
DoF Viewer 4.0, for iPhone and iPad.

 On a computer? Scan with your iPhone.